 Hello friends, hope you all are fine and having good health. In today’s post I am gonna share an Ultrasonic Sensor Library for Proteus. Few days ago I have posted a tutorial on Arduino Library for Proteus which also has the Ultrasonic sensor in it but that’s a quite basic library for Ultrasonic sensor, so here comes the new Ultrasonic Sensor Library for Proteus. Using this library you can perform any kind of function with ultrasonic sensor.
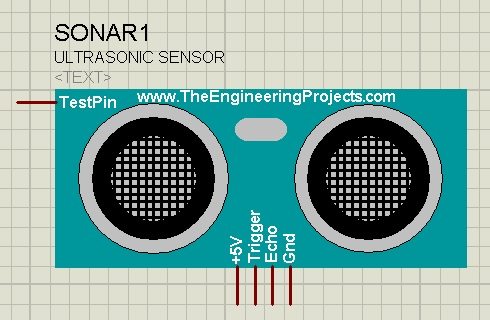
First of all, lets have a brief introduction of ultrasonic sensor. In ultrasonic sensor, there are two nodes in which one is transmitter while the other is receiver. The transmitter sends an ultrasonic wave and this wave strikes to any hindrance present in front of it and then bounces back. This bounced ultrasonic sensor is then captured by the receiver and on the basis of the time taken by this wave to return, the sensor calculates the distance of that obstacle from that sensor. Ultrasonic sensor is usually used for detecting the obstacle in path and also to find the distance between sensor and the obstacle. Ultrasonic sensor normally used is HC-SR04, which is also used here in this library. Let’s get started with Ultrasonic Sensor Library for Proteus, in this library we have used an extra pin on ultrasonic sensor, which is analog pin. The voltage on that pin is used to detect how close object is because its a simulation and we can’t place an actual object in front of our laptop. Moreover, you should also have a look at this Home automation Projects using XBee & Arduino, I have used this ultrasonic sensor in that project.
I hope you are gonna enjoy this library, I have also shared many other libraries which are mentioned below, I hope you are gonna enjoy them too. These libraries are designed by our team after a lot of effort so its a humble request to all other bloggers that share it as much as you can but do mention our blog post link in the description.  So, let’s get started with it:
So, let’s get started with it:- In this ultrasonic sensor library for Proteus, you will find three files which are:
- UltrasonicTEP.IDX
- UltrasonicTEP.LIB
- UltrasonicTEP.HEX
- Now, place these three files in the library folder of your Proteus software.
- Now start your Proteus software and in components list, search for Ultrasonic sensor and place it in your workspace as shown in below figure:
- Now we have our ultrasonic sensor in Proteus but if you run it then it won’t work as we haven’t yet added any functionality in it.
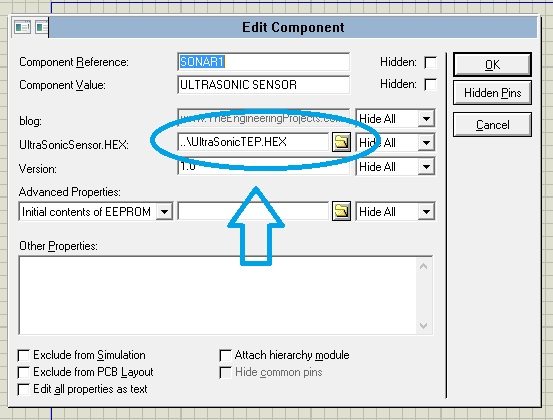
- So, in order to add the functionality double click this ultrasonic sensor and open its properties.
- In properties, select the Program File section and browse to UltrasonicTEP.HEX file and upload it as shown in below figure:
- Now our ultrasonic sensor is ready to be used.
- Now let’s make a simple example for ultrasonic sensor so that you get an idea how to use it in Proteus.
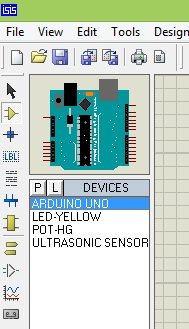
- After adding the Ultrasonic Sensor Library for Proteus, open your Proteus ISIS software or restart it if its already open.
- Now search for the below components in the Proteus Components Library and add them in your workspace as shown in below figure.
- After adding these components, now design a simulation as shown in below figure:
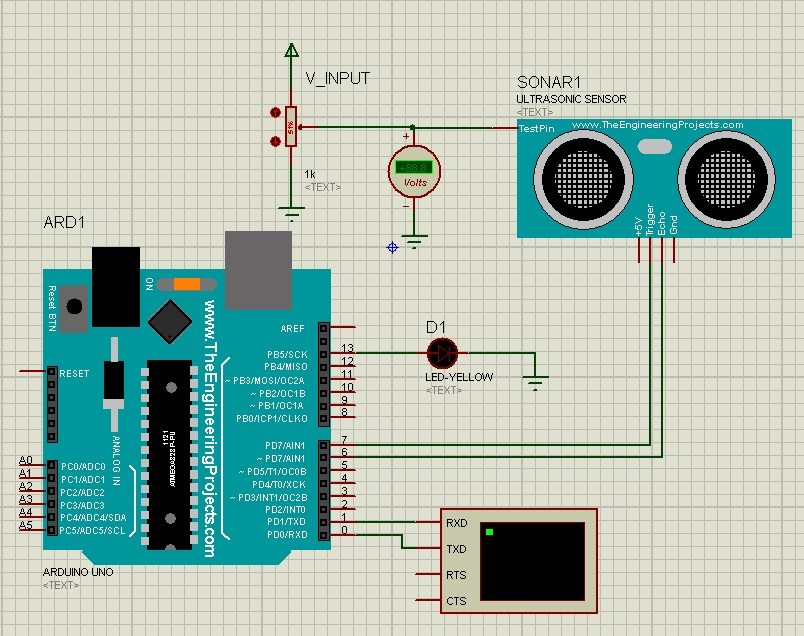
- Now in this example, I am receiving data from Ultrasonic Sensor and then printing this data over Virtual Terminal in Proteus, if you are not much familiar with Virtual Terminal, then read How to use Virtual Terminal in Proteus ISIS .
- Now open your Arduino software and paste the below code in it and compile to get the hex file, read Arduino Library for Proteus to know how to get the Arduino Simulation in Proteus.
- You must also read How to get the hex file from Arduino Software.
- Its quite a simple code and is self explanatory, if you still got some trouble then ask in comments and I will reply them. I have simply used the ping example in ArduinoExamples and slightly modified it.
- After getting the hex file, now upload it to Arduino in Proteus by clicking the properties.
- Click on the Start button and if everything’s gone fine then you will see an output as shown in below figure:
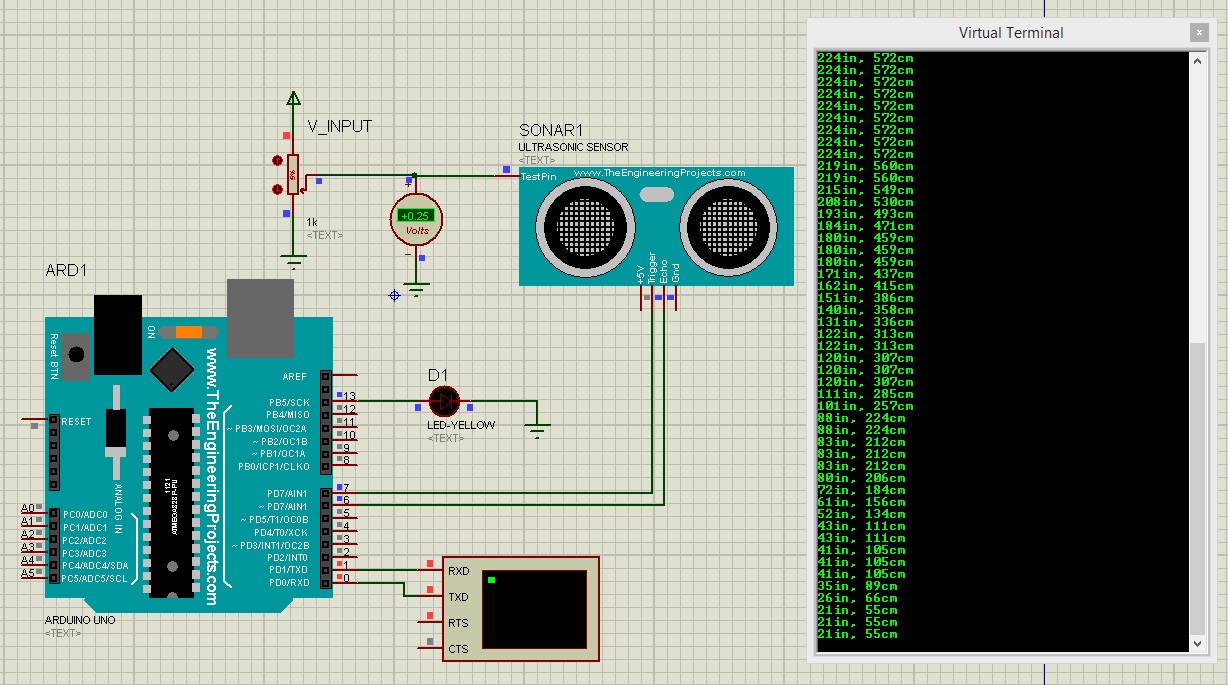
- As you can see in the above figure, the virtual terminal is showing distance values, now this value depends on the variable resistance attached to the ultrasonic sensor.
- As you change the value of the variable resistance, the voltage on that particular pin will also change and on the basis of that you will get the distance in inches and centimeters on the virtual terminal.
- Arduino code and hex file along with the Proteus Simulation for this ultrasonic example are attached below. You can download it by clicking on the below button but I would suggest you to design it on your own, it will help you in learning.
- youtube vedio link:https://youtu.be/x2W-5-Vr_RU
Comments
Post a Comment